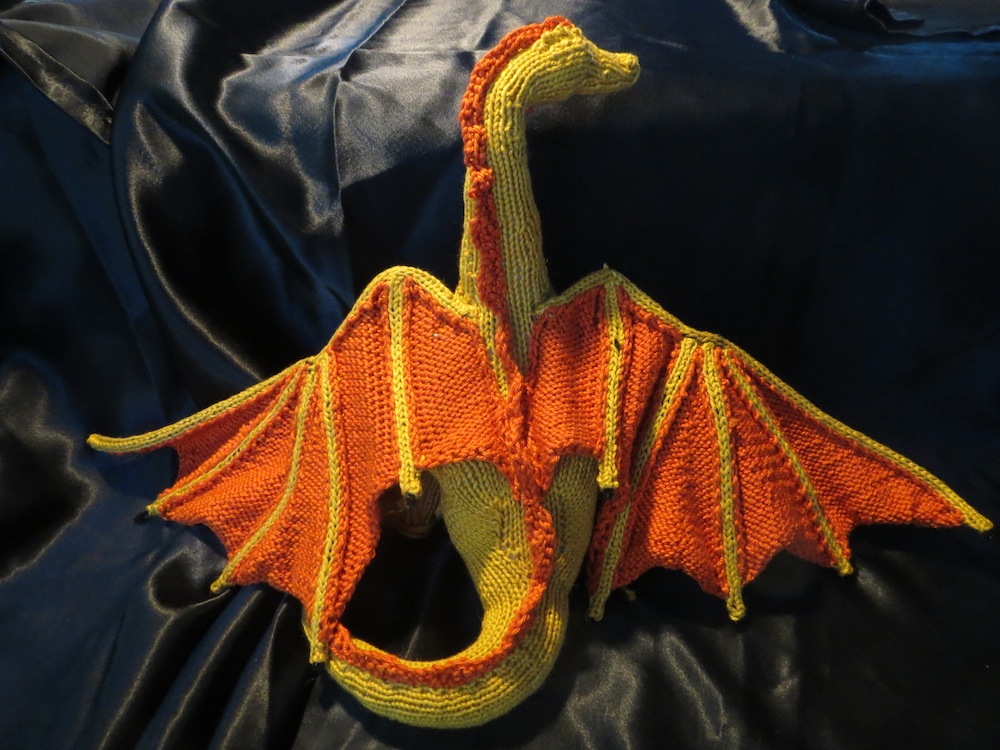
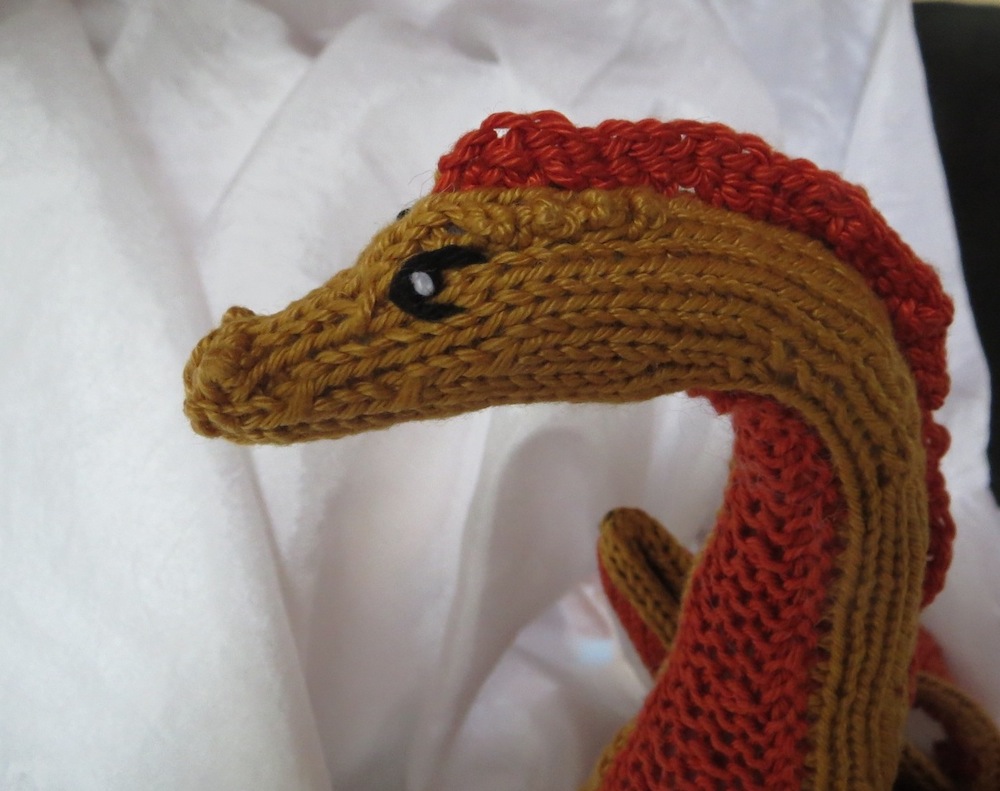
Stitching things together used to be one of the part I disliked, but most of that stemmed from my impatience and how it turned out. If you slow down and make stitching part of your craft, it becomes a lot more enjoyable. At least it does for me. The directions are little more than "stitch this to that," but I've got a bunch of videos on where to start, how to make your tummy ridges even, how to finish off the neck so it is seamless. I can't say enough how much a difference your dragon will look if you slow down and make the stitching as even as you can. After this, there is just the eyes and perhaps sewing the completed legs to the body for more support.
Your dragon is almost done!
Instructions:
Starting tummy panel to maintain parallel tummy ridges:
Attaching the leg bones together:
Finishing neck so it is seamless :
I had to break this into two videos. Sorry. My browser is not up to date, and I can't splice them together.