| Home / Site Map / Blog / Books / Events / Bio / Freebies / Media |
|
|
|
I M
H A R R I S O N S
D R A G O N |
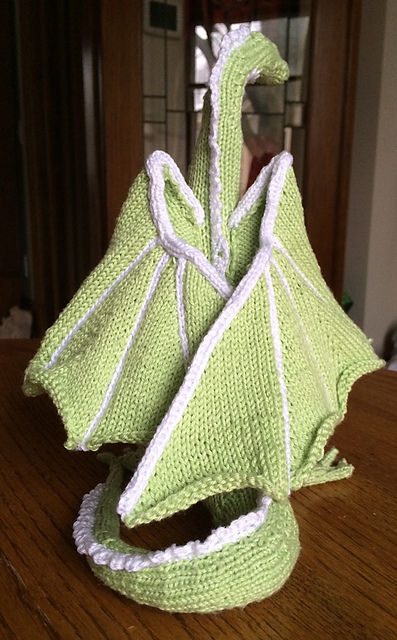
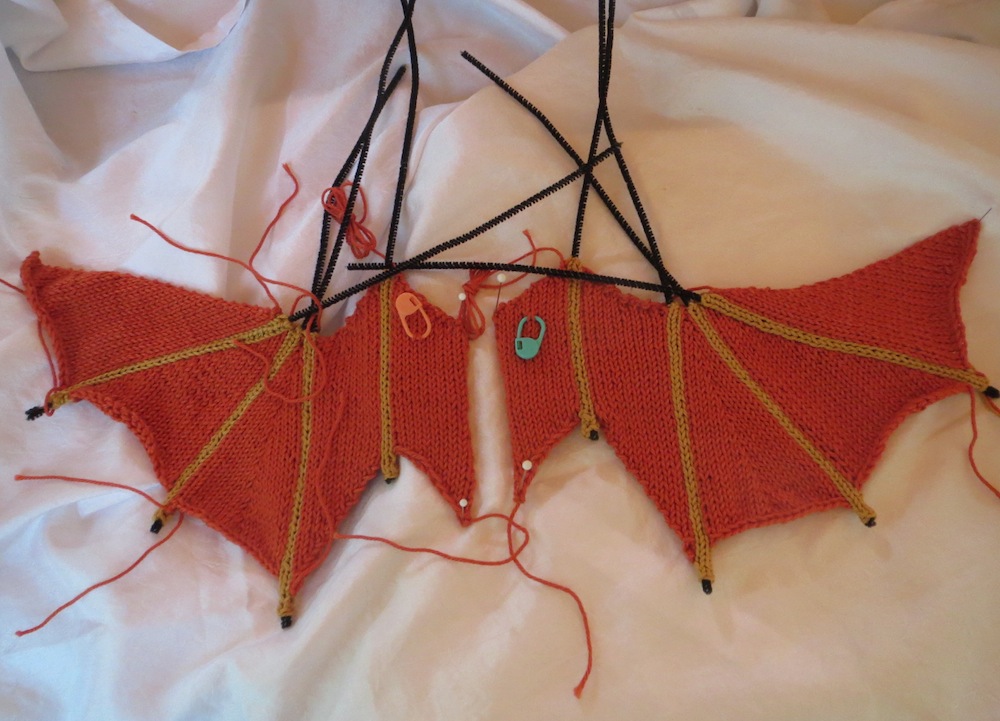
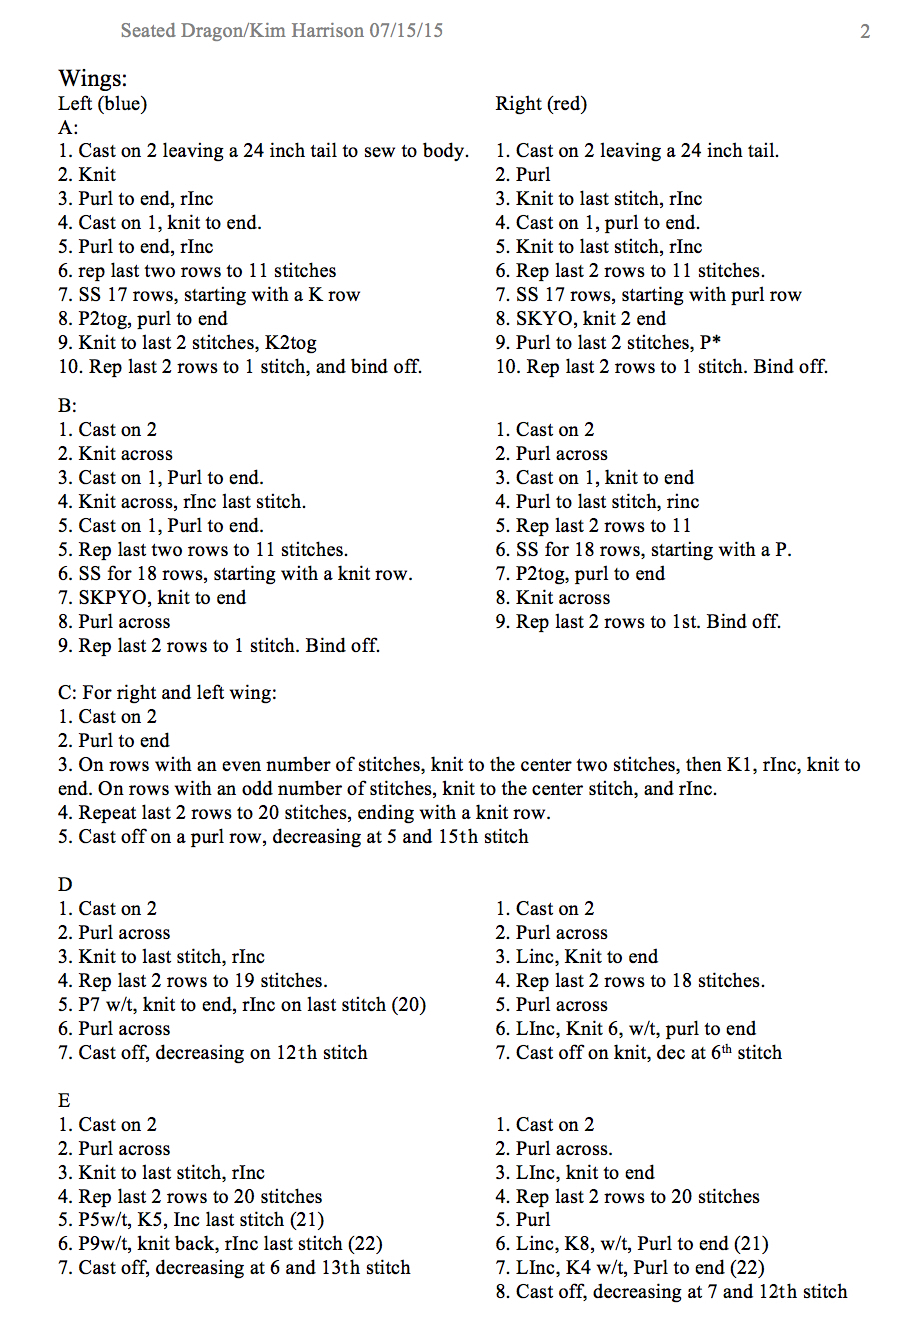
The right wing is a mirror image of the left wing, and I do believe there is just one stitch, the P* decrease on a purl side, that I've not shown you. The wing bones are the same as well, and when you're done, you'll have something like this. You might notice that they are reversed with the blue (left) is pictured on the right. This is so you can see the top of the wings. When they are sewn on, the blue will be on the left of the dragon. As before, I'll give you the down and dirty directions first, then the explanation below with the video supplementals. Next, I'll show you how to knit the "bones," and start putting it together. Then I'll give you the instructions for the right wing panels, and after that, how to attach the wing "backbone." After that are the feet, but that will need another page. I usually sew the wings together as I knit the panels so I don't get confused on what panel goes where, but I thought this would be easier than giving it to you all at once. Below are the down and dirty instructions, and below that, the explanation, and way at the bottom, the abbreviations. Note, I've got the directions for both the right and left wing panels here. P* from the purl side:
|
Revised: 03/06/2017 Copyright © 2015 by Kim Harrison. All rights reserved.
